
Step 1: choose the groups
In the main menu go to Members (Leden) and choose Communication (Communicatie). Click New mailing at the top right. At the top you choose who receives the email.
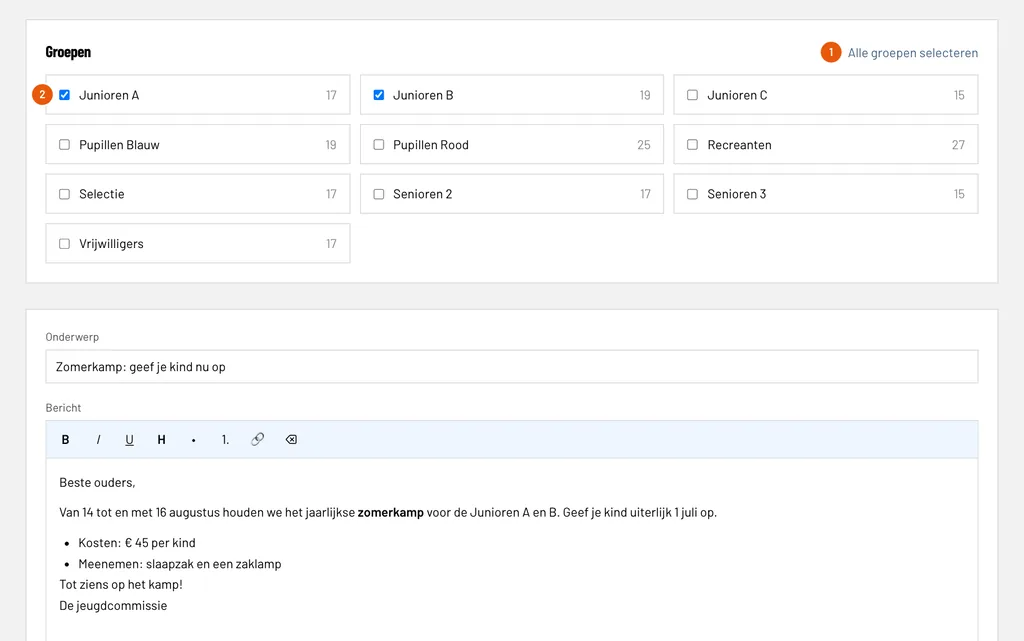
Select all groups: ticks all groups at once, for a message to the whole club.
A group: tick the groups that should receive the email, here Junioren A and Junioren B. The number behind the name is the number of email addresses in that group.
Only active members with an email address count. A member who is in both groups gets the email once.
Step 2: write the email
Below the groups you fill in the subject and write the message. The buttons above the text box are for formatting.
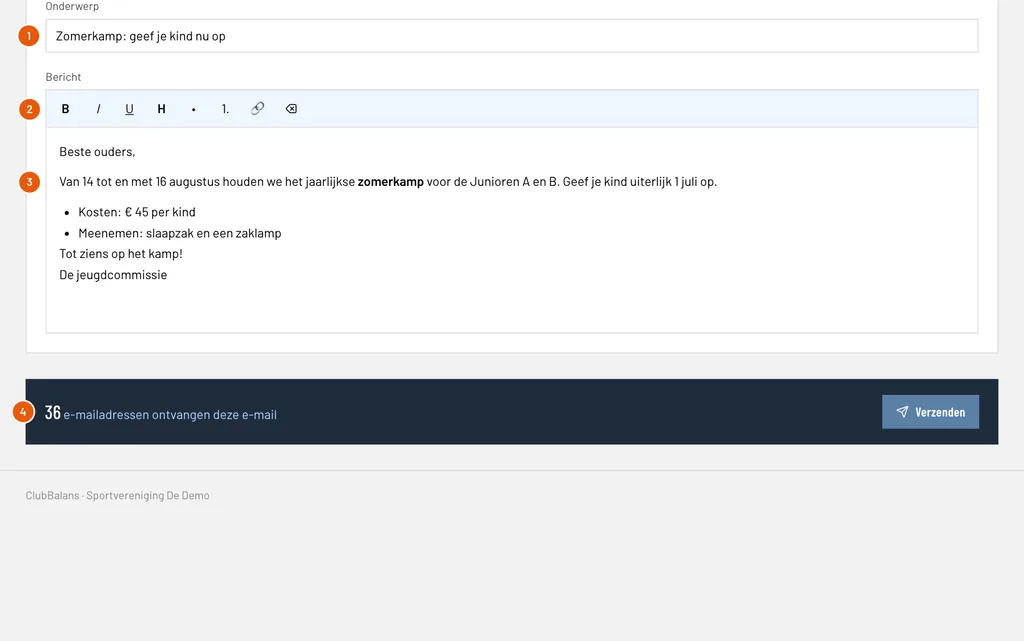
Subject: what the recipient sees in their inbox. Keep it short and concrete, here Summer camp: sign up your child now.
Formatting: make text bold, italic or underlined, choose a heading, make a bullet or numbered list and add a link. If you paste text from another program, only the text comes along and not the formatting.
Message: the text of the email. ClubBalans puts the name of your club above the message, and at the bottom why the member receives the email.
Number of email addresses: the total that receives the email, which changes with the groups you tick. If you see 0, the chosen groups have no members with an email address.
Step 3: send and confirm
Click Send at the bottom right. ClubBalans asks whether you want to send the email to the number you just saw. This is your last chance to stop: you cannot recall a sent email. Click OK and the email goes out and you land on the result page.
Step 4: follow the delivery per email address
At the top you see the message as you sent it, below it every email address with the state of its delivery. It updates by itself while the emails go out.
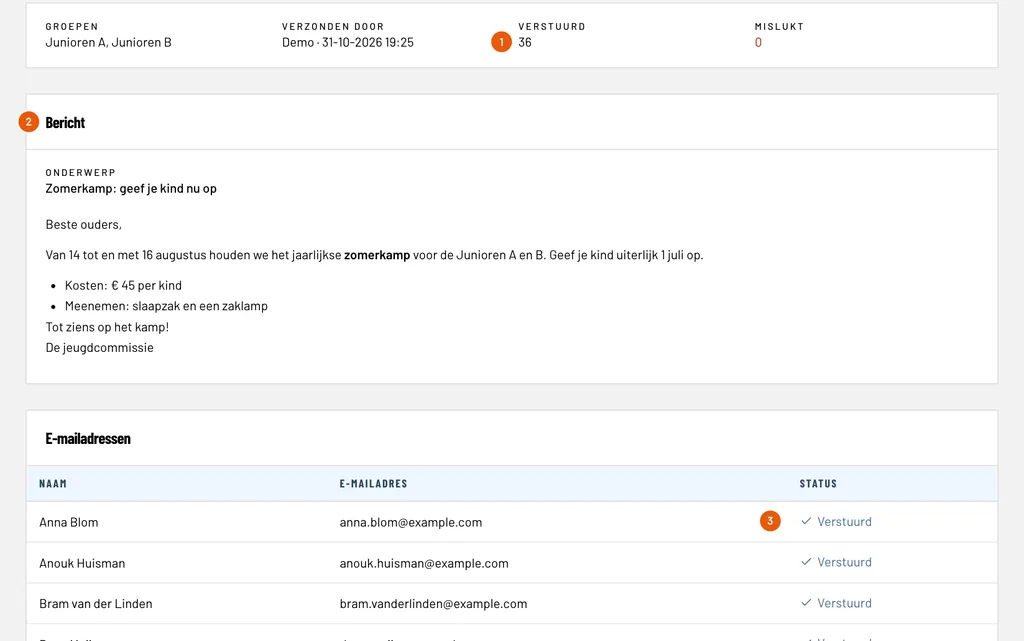
Sent and Failed: the number of addresses that got the email and the number that failed. Add them up and you get the number of recipients.
Message: the subject and the text as the members received them. You can always look back at what you sent to whom on a certain date.
Check mark: the email was accepted for delivery. While you are waiting for an address it says Waiting.
If something goes wrong, the address gets a cross with the reason, for example that the address does not exist. The address is then a form field. Correct it and click Save and send again, and only that address gets the email once more. With Send failed emails again at the top you try all failed addresses at once, for example after an outage. Also fix a wrong address on the member card, so the next mailing goes well.
The Communication page lists all your mailings with the number of recipients, sent emails and failed addresses.
Good to know
- Everything you do with a mailing is recorded in the change log. Who may send mailings, you decide per role.
- If you want to address members personally or send invoices, use the invoices: they go per member, with a PDF. Read more in collecting membership fees.
- Members who keep their own details up to date do so in the member area. That way your mailing reaches more members.
- More about the member administration is on member administration.